Make sure to check out our screenshots and videos page for video tutorials on using VirtualEcho for both the TTE and TEE versions.
Welcome! If you are reading this section we assume that you either already have a prior background about ultrasound or echocardiography, or have read the previous two sections entitled “Ultrasound principles”, and “Echocardiography principles”.
VirtualEcho is quite easy to use, there’s really nothing to it at all. Read on and you’ll be performing virtual echocardiography in no time!
The main screen
<
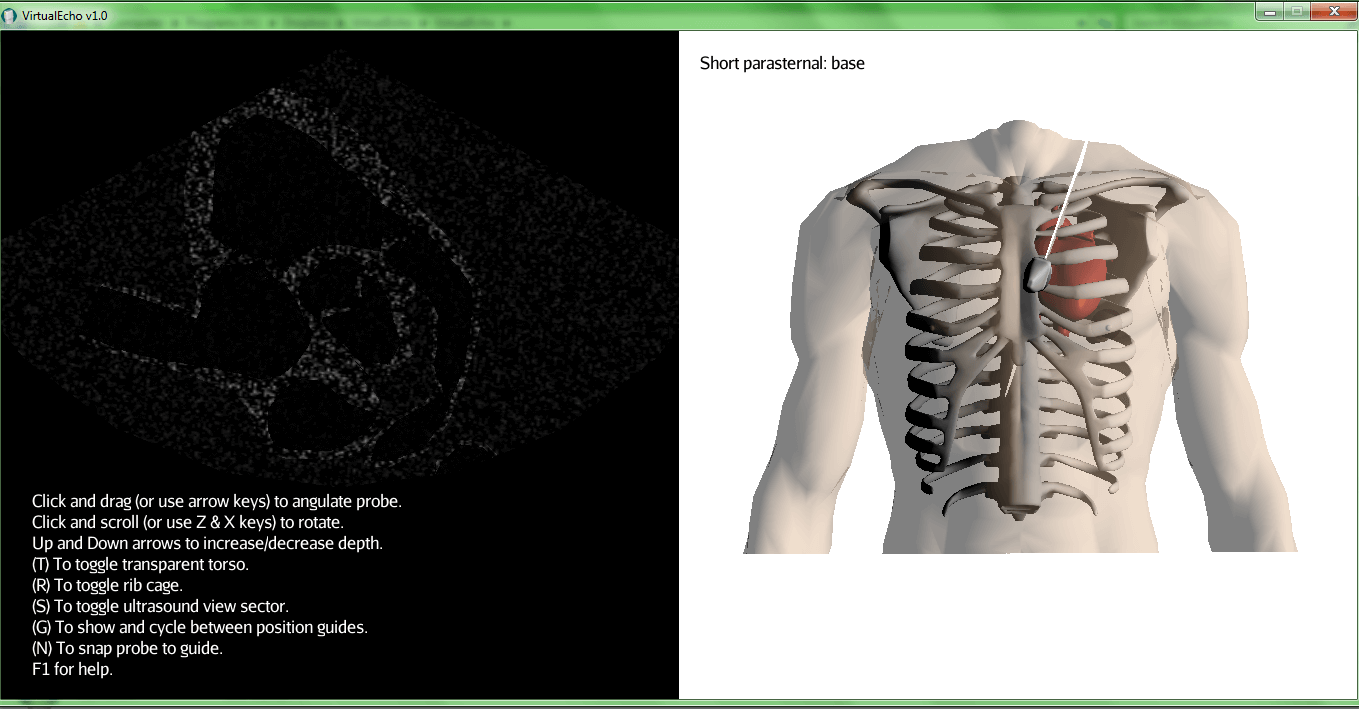
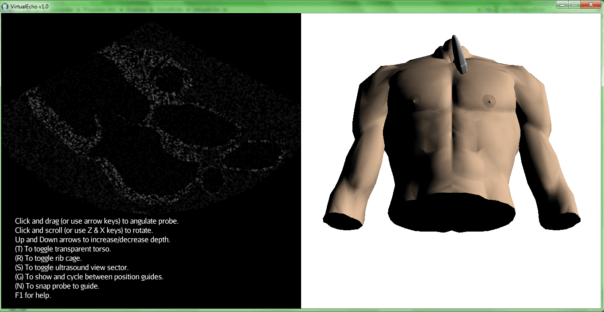
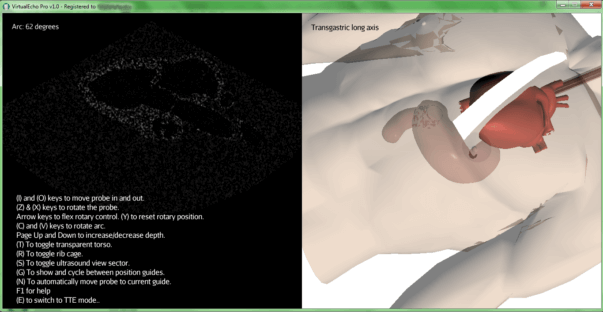
When you open VirtualEcho, you’ll see the screen split into two viewports. The one on the right shows a man’s torso, while the left one shows an empty echo screen, with a few lines of text at the bottom. Once you start moving the mouse over the torso, an echo probe will appear and will follow the mouse cursor as it moves. The resulting echo image will be shown on the left.
You can adjust the view on the right. Scrolling your mouse wheel up and down will zoom in and out respectively. If you right click and hold, moving the mouse will rotate the view. This allows you to look more closely and with different angles at the positions in which you want to place your probe.
Moving the probe
An echo probe has three possible movements:
Sliding
As mentioned above, simply moving the mouse cursor in any direction over the torso will slide the probe over the body in that direction. You will notice that while moving the probe, the image on the right will sometimes become bright and fuzzy. This will happen whenever the probe is on a rib. You can turn this off by pressing the “R” key as explained below.

Angulation (tilt)
If you press and hold the left mouse button while the probe is on a point in the torso, the probe will stick to that point, and moving the mouse will now result in the probe being tilted. Moving the mouse up and down will tilt the probe caudally and cranially (respectively), while moving the mouse sideways will tilt the probe laterally. You can also achieve this by using the arrow keys, which gives you more precise control, and allows you to tilt the probe purely in one direction without accidentally tilting it another way.

It is important to note that angulation is with respect to the axis of the probe, not the patient or the view. This means that if the probe is rotated at 45 degrees, and you click and move your mouse down, the probe will not tilt straight down, but diagonally (which is caudal relative to the probe). This can be a little disorienting at first, especially when you attempt it while looking at the probe, however the point of this is to facilitate manipulating the probe without looking at it, as in real life when your eyes will always be fixed on the echo screen as you move the probe.
Rotation
Rotating the probe is achieved by again pressing and holding the left mouse button, but then instead of moving the mouse, scroll the mouse wheel with the left mouse button still pressed. Scrolling down will rotate the probe clockwise, while scrolling up will rotate it anticlockwise. Alternatively, you can use the x and z keys to rotate the probe.

Hotkeys
There are a number of hotkeys which provide added functionality to your VirtualEcho experience. They are listed on the bottom left of the screen, and are explained below:
- The page up and page down keys: increase and decrease the depth (penetration) of the ultrasound image, similar to the corresponding functions in a real echo machine.
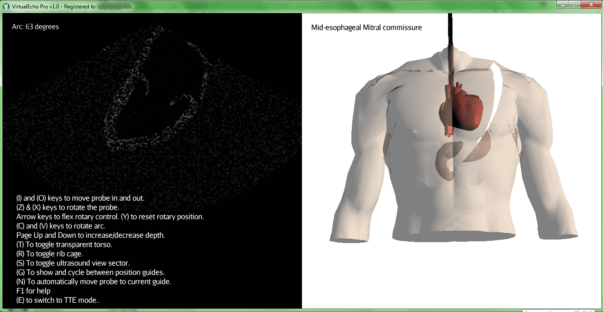
- T key: will switch between opaque and transparent modes for the torso, enabling you to see the ribs and heart inside the chest.
- R key: will show/hide the rib cage (note that you are not going to see this happening unless you set the torso to transparent using the “T” key explained above). It will also eliminate the effect of the rib cage on the echo image, so that ribs will not get in your way while you work.
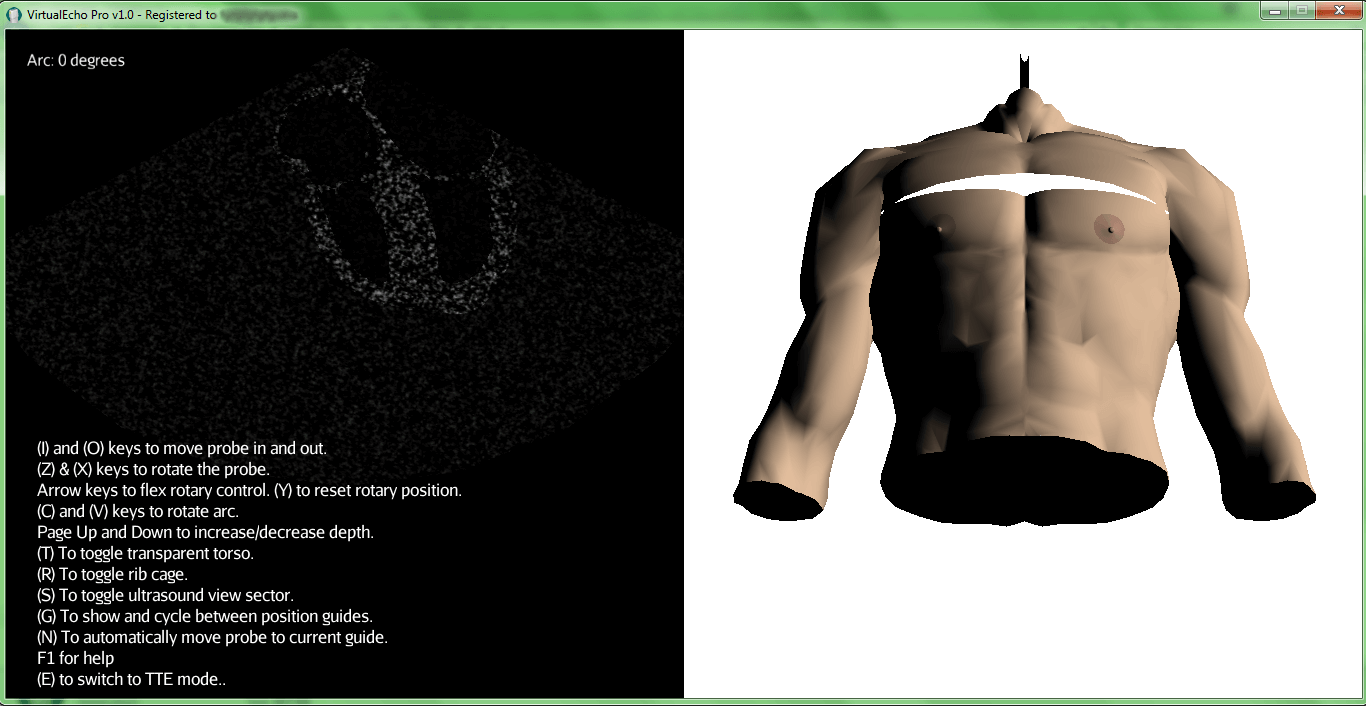
- S key: will show/hide the white sector of ultrasound seen coming out from the tip of the
probe. - G key: will show and cycle between a set of “guide” probes that show up at the locations of the standard echo views (long parasternal, short parasternal base, short parasternal mid-cavity, apical four chamber, apical five chamber, apical two chamber, apical three chamber, suprasternal, and finally subcostal).
- N key: If a guide is shown, pressing the “N” key will align your probe to it, allowing you to obtain the corresponding view.
That’s all there is to it! Now you can go ahead and start using VirtualEcho. We hope you like using it as much as we enjoyed making it!